
If your WordPress site feels slow (especially on mobile), images are often the quiet culprit. Hero banners, product galleries, blog photos, and page-builder backgrounds can easily make up most of a page’s weight. Compressing those files is one of the highest-impact changes you can make—without redesigning the site or changing your hosting plan.
This guide explains why smaller images help performance tools like Google PageSpeed Insights (PSI) and GTmetrix, what “good” compression actually means, and how to approach optimization when you need unlimited processing, careful quality control, and a clear before/after check.
Images and page speed: what really slows people down
A visitor does not wait for “your WordPress theme.” They wait for the largest visible content — often a photo or illustration — to appear. That moment is closely related to Largest Contentful Paint (LCP), one of Google’s Core Web Vitals.
Heavy images affect speed in three practical ways:
- Download time — a 2.5 MB JPG on a phone connection can stall the first screen for seconds.
- Render delay — the browser must download and decode the image before the layout feels complete.
- Bandwidth waste — returning visitors, editors, and customers pay the cost on every page that reuses oversized media.
Compression reduces file size while keeping the image visually acceptable. Done well, visitors still see a sharp photo — your report tools just stop flagging “enormous network payloads.”
What Google PageSpeed Insights and GTmetrix usually report
Google PageSpeed Insights
PSI scores lab and field data and highlights opportunities such as:
- Properly size images
- Serve images in next-gen formats (WebP / AVIF)
- Efficiently encode images
- Reduce unused downloads tied to oversized media
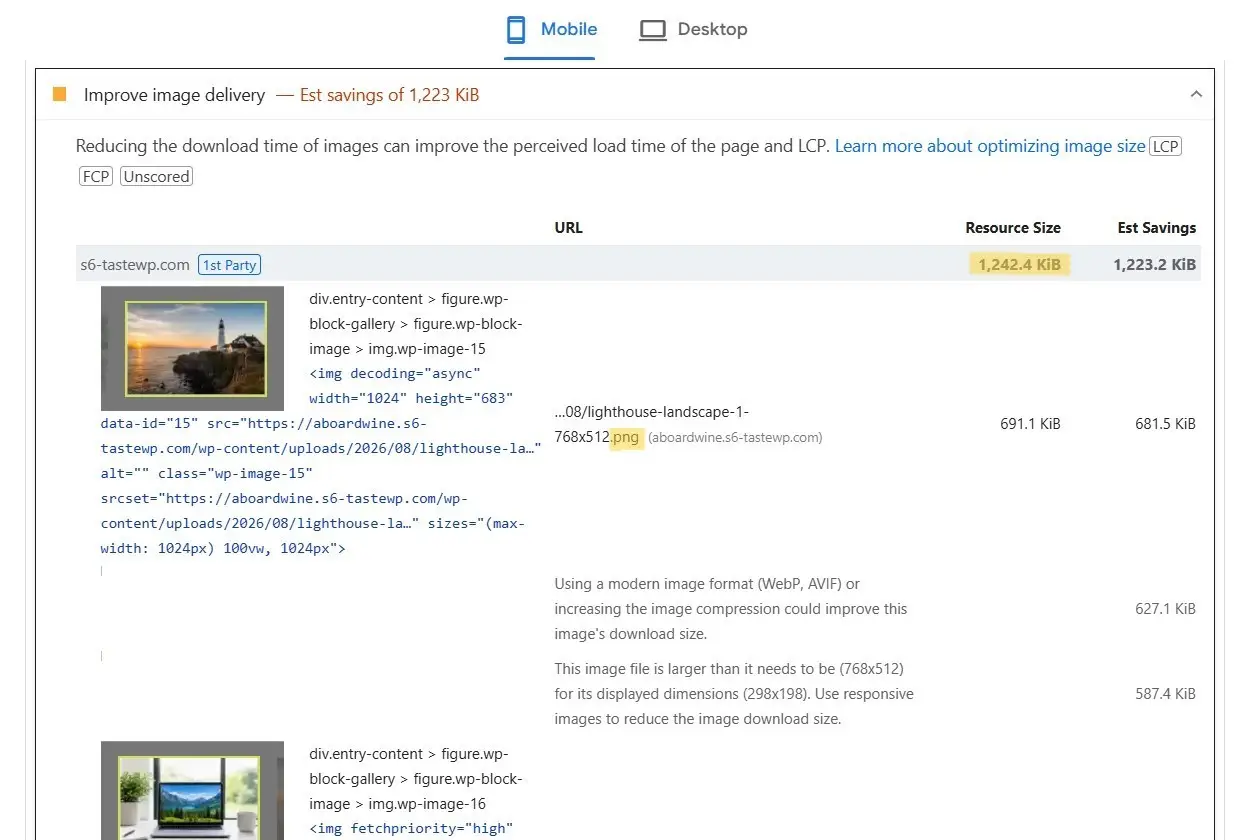
Before compression/converting images:
After compression/converting images:
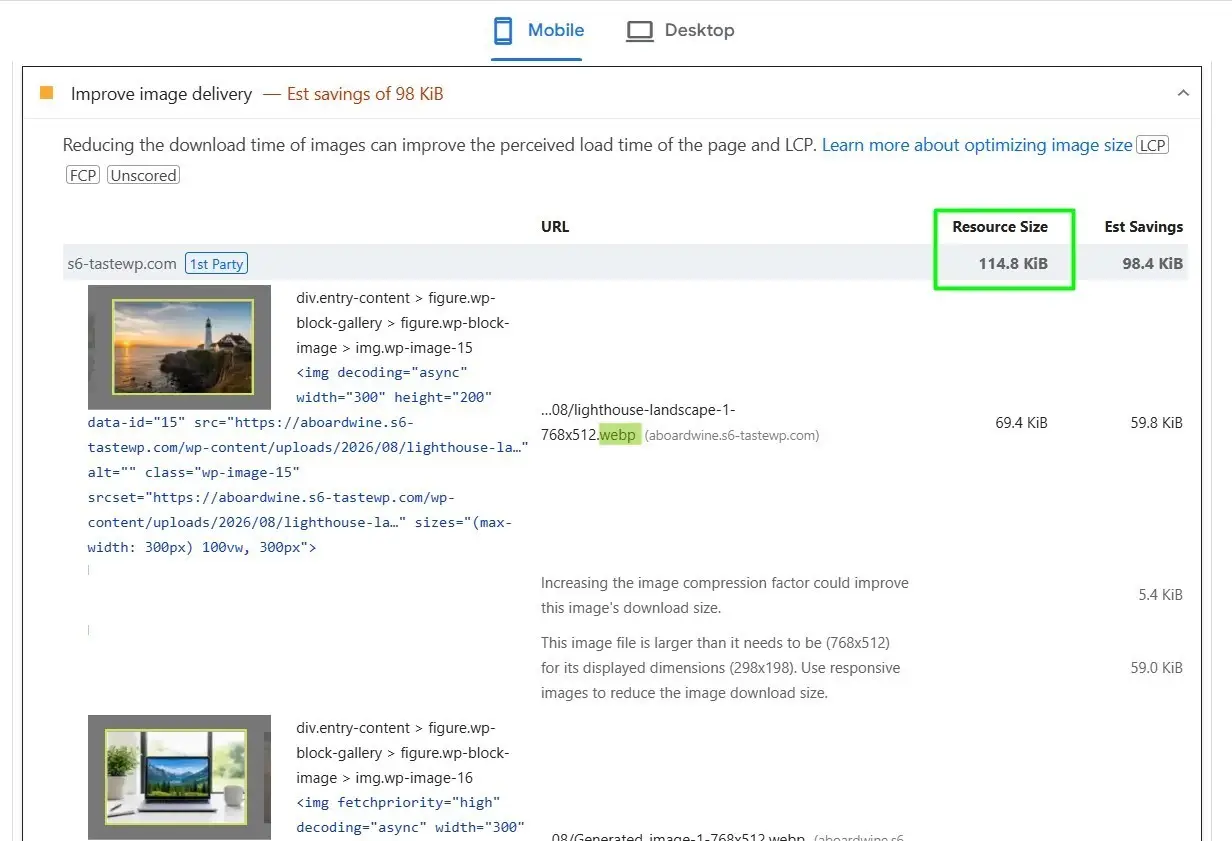
You do not need a perfect 100. You need fewer image-related warnings and a faster LCP on real devices. Compressing the Media Library and converting suitable assets to modern formats is often enough to move the needle.
GTmetrix
GTmetrix (and similar waterfall tools) make the same problem visible in another way:
- Large image requests dominate the waterfall
- Fully loaded time stays high even when HTML/CSS look fine
- “Page weight” stays in the multi‑megabyte range because of media
After compression, you should see smaller image transfer sizes, a shorter waterfall for those requests, and often a better Structure / Performance balance — especially on the mobile test profile.
Why “unlimited” image optimization matters
Many WordPress sites grow quietly: WooCommerce galleries, client portfolio uploads, blog archives, and staging copies. A fixed monthly quota forces awkward choices — skip old posts, stop optimizing thumbnails, or pay more as the library grows.
Unlimited local optimization flips that model:
- You can bulk-optimize the full Media Library, not just the newest uploads
- You can re-run compression after changing quality settings
- You are not blocked mid-project because you hit a cap
- Agencies and multi-site owners can process large libraries without rationing credits
With a tool like Squeeze, compression runs in the admin browser with Web Workers (the same family of codecs used by tools like Squoosh). Images are not sent to a third-party compression API for processing, which also helps on privacy-sensitive and membership sites.
No API key. No monthly image quota imposed by the optimizer itself. That combination is especially useful when you are cleaning up years of uploads in one pass.
The nuances of compression settings (quality is not one slider)
“Just set quality to 70” is rarely the best advice. Different formats behave differently, and WordPress stores multiple sizes for many uploads.
Format-specific quality
A good optimizer lets you tune JPEG, PNG, WebP, and AVIF separately. For example:
- JPEG — photographic content; MozJPEG-style encoding often wins on size at similar visual quality
- PNG — logos, UI, transparency; aggressive settings can blur edges or inflate processing time
- WebP / AVIF — usually smaller at comparable quality; great for delivery, but you should validate theme and CDN behavior
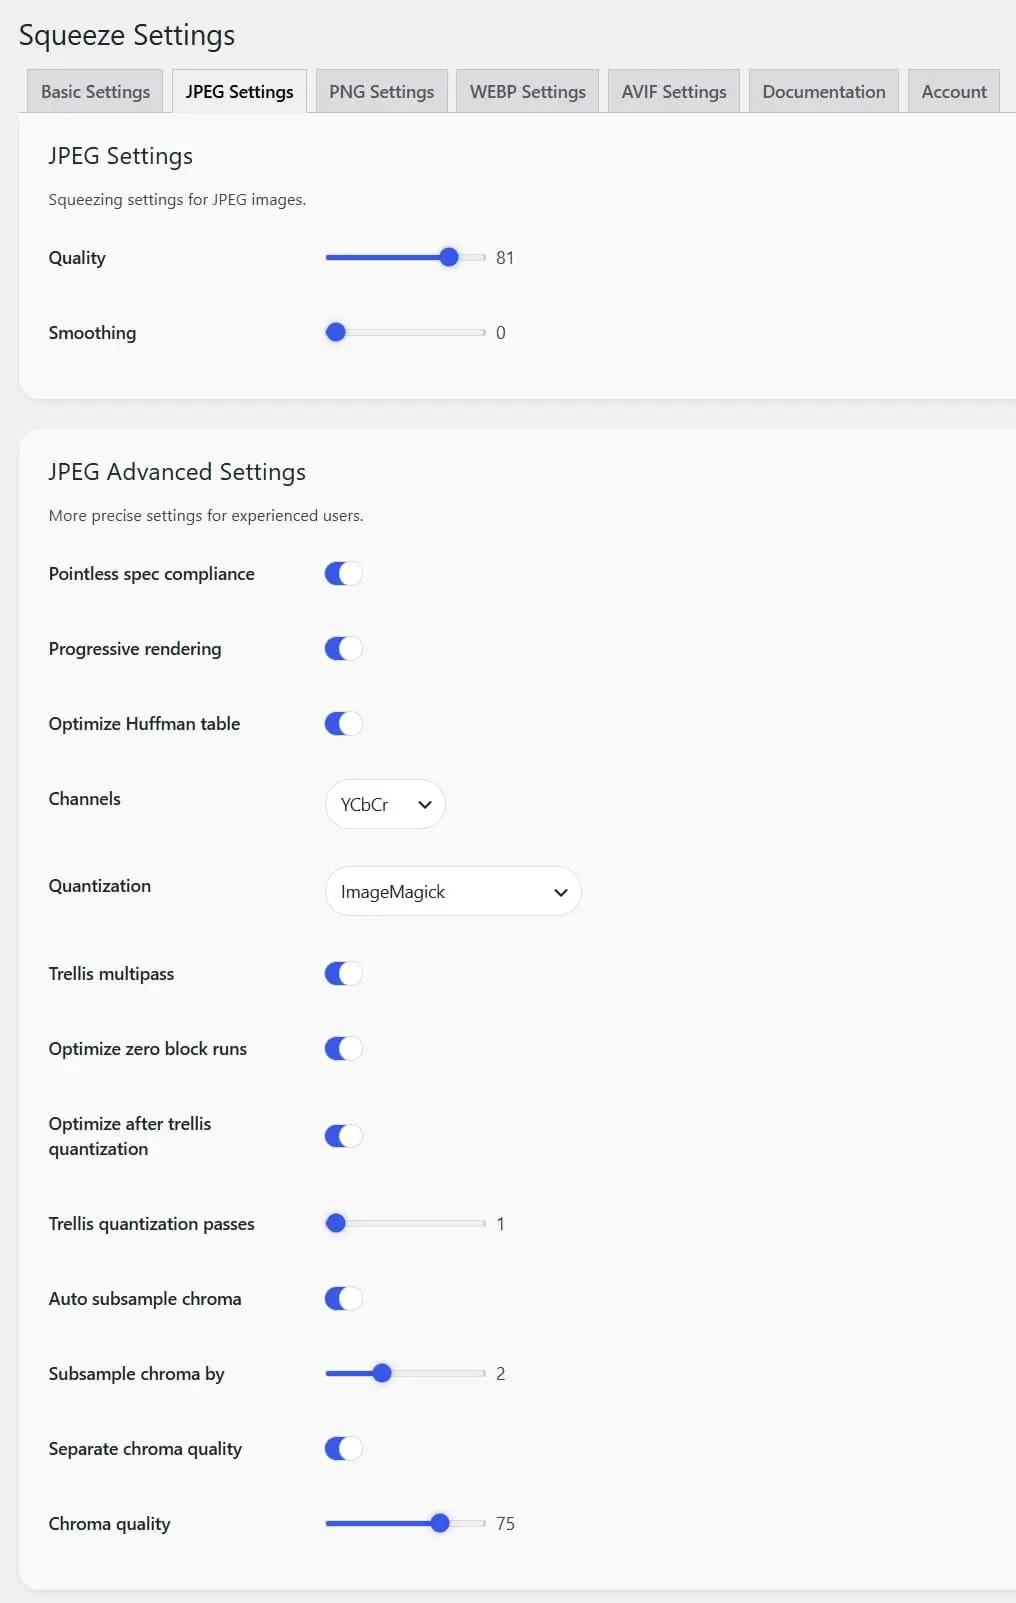
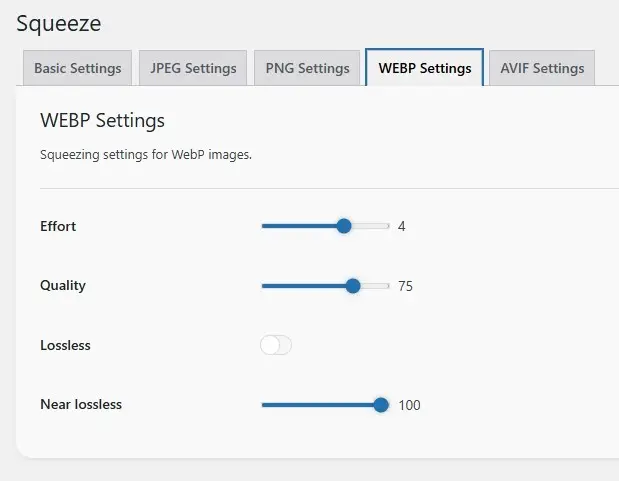
Start conservative, measure with PSI/GTmetrix, then lower quality only where savings are large and differences are hard to notice.
Thumbnails vs originals
WordPress creates multiple registered sizes. Compressing only the full-size file leaves heavy thumbnails in grids, related posts, and product loops. Squeeze can target selected thumbnail sizes so the front end actually receives lighter files.
Resize before squeeze (Premium)
Sometimes the real problem is dimensions, not encoding. A 4000px photo displayed at 800px is wasted weight. Premium max width/height controls let you downscale originals before compression — often the biggest win for LCP heroes.
Backup and restore
Always enable backups when you are dialing in settings. A .bak copy means you can restore an original if a logo or illustration was over-compressed. That safety net makes experimentation practical instead of stressful.
Exclusions
Some assets should never be touched: brand SVGs exported as PNG, already-tiny icons, or campaign creatives with strict visual requirements. Pattern-based exclusions keep bulk jobs safe.
WebP delivery: smaller files, fewer storage headaches
Modern formats are one of the most common PSI recommendations. Squeeze supports WebP workflows in multiple modes, including Direct WebP conversion, which can replace JPG/PNG originals on disk so you do not keep duplicate copies forever.
Other modes keep originals and serve WebP via HTML rewrite or server rules when that fits your stack better. If you use offloaded media / CDN storage, pick the mode that matches how files are actually requested — Direct WebP is the simplest path when files live off the origin server.
On new uploads, enabling squeeze on upload (including Gutenberg, Elementor, GenerateBlocks, and Voxel flows) means optimized files land in the library from day one — so you are not constantly cleaning up after editors.
Ready to try
Squeeze?
See the result: before/after comparison (Premium)
Guessing is how sites end up either too heavy or too soft. Premium image comparison in the Media Library shows what changed after a squeeze — so you can confirm savings and visual quality on real attachments, not abstract percentages.
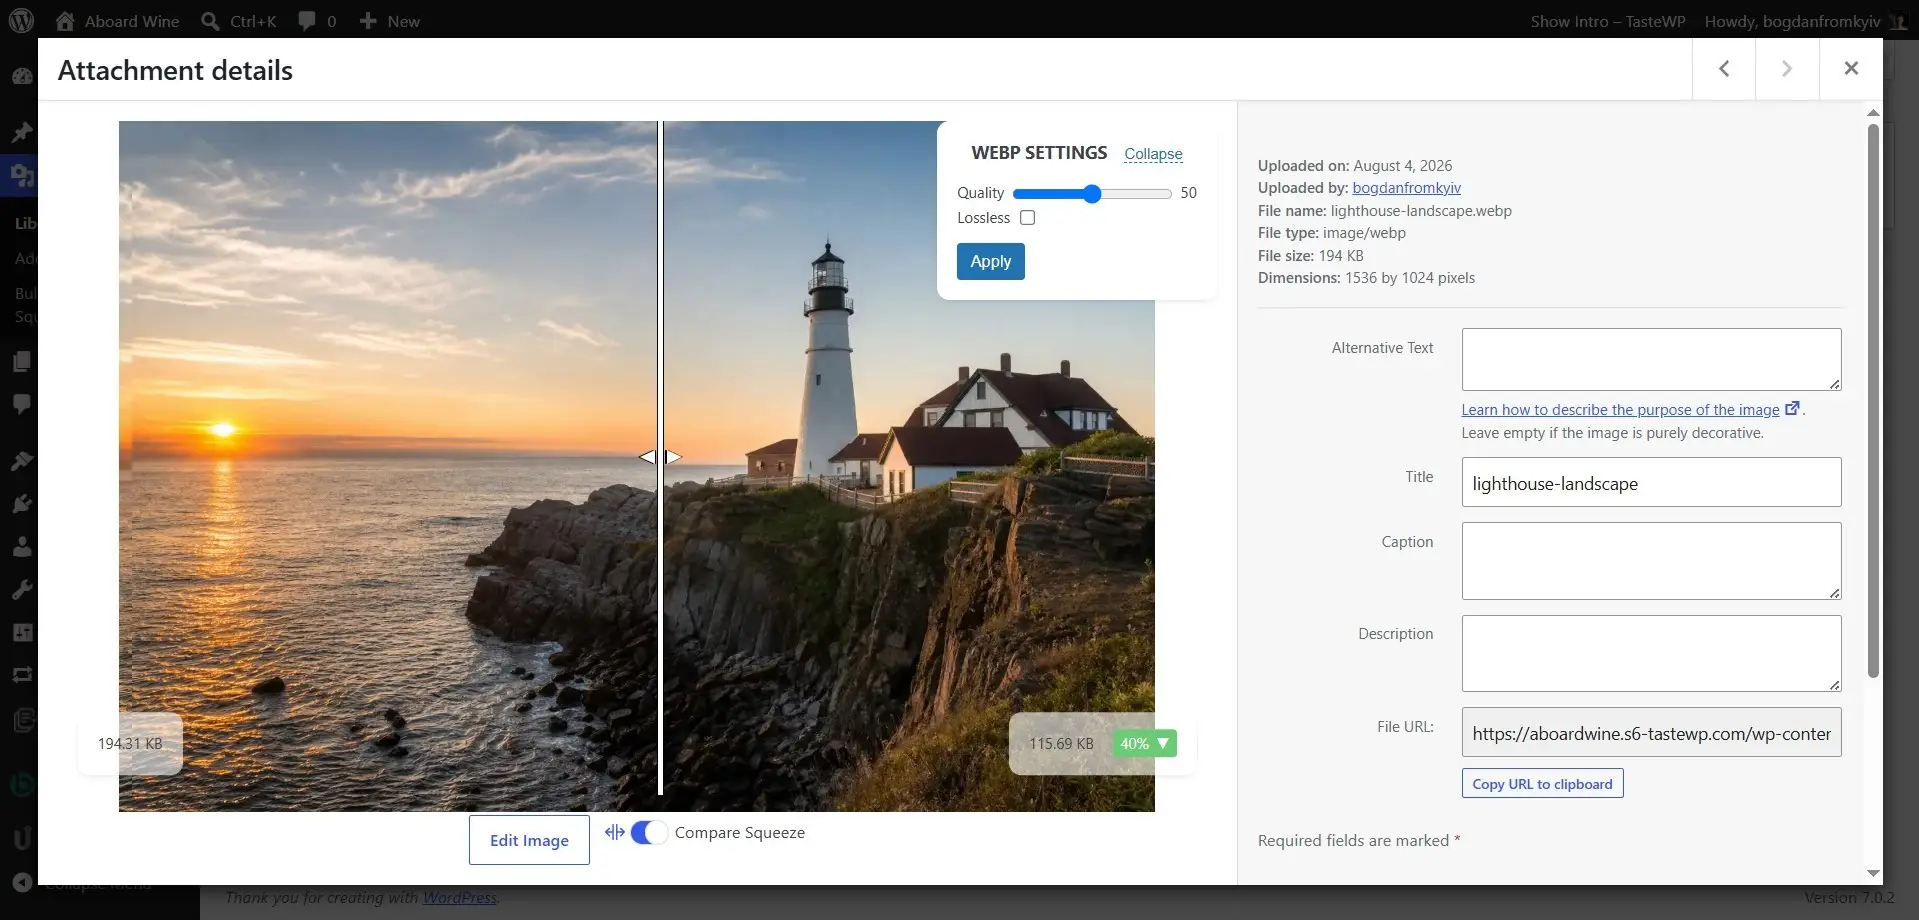
Use it when:
- Setting default quality for a client site
- Checking whether WebP conversion is worth enabling globally
- Reviewing a problematic PNG that “got larger after compression” (it happens with already-optimized files)
Pair comparison with GTmetrix/PSI on a representative page and you get both sides of the story: visual confidence and measurable performance.
Other Squeeze features worth using in a real workflow
Beyond one-off compression, these features help keep a WordPress site fast over time:
- Bulk Squeeze with pause/resume — clean large libraries without babysitting every file
- Directory Squeeze — optimize images outside the Media Library (theme folders, custom upload paths)
- Bulk squeeze from a page (Premium) — focus on the exact images used by one slow URL you are tuning in PSI
- Elementor on-upload squeeze (Premium) — keep builder workflows optimized as content is added
- CDN URL mapping (Premium) — help WebP delivery when image URLs point to a CDN
- WP Offload Media compatibility — compress and sync when media lives on S3/GCS/Spaces (Direct WebP recommended)
- AVIF support — another next-gen option where your audience and stack can benefit
- Client-side processing — useful when you prefer not to upload media to external optimization servers
Ready to try
Squeeze?
A simple optimization checklist
- Run PSI and GTmetrix on a key landing page; note image-related opportunities and page weight.
- Enable backups, then compress a small sample and review quality.
- Tune per-format settings; include the thumbnail sizes your theme actually outputs.
- Enable WebP delivery after a staging test.
- Turn on squeeze-on-upload so new content stays optimized.
- Bulk-optimize the rest of the library (unlimited runs help here).
- Re-test the same URL in PSI/GTmetrix and compare transfer sizes and LCP-related metrics.
- Use Premium comparison (and page-based bulk squeeze) for stubborn pages that still look heavy.
Final thoughts
Compressed images are not a vanity metric—they directly affect how fast your WordPress site feels and how tools like PageSpeed Insights and GTmetrix score it. The winning approach is not the lowest quality setting; it is controlled, unlimited optimization with sensible defaults, WebP where appropriate, backups for safety, and a clear before/after review when quality matters.
If you want that workflow in WordPress without monthly image caps or API keys, try Squeeze—start free for bulk and on-upload optimization, then use Premium when you need comparison, resizing, and deeper builder/CDN workflows.