

Squeeze Documentation
Latest update on 15.08.2025
1. Introduction
Welcome to the Squeeze Plugin Documentation
Squeeze is a powerful WordPress plugin that optimizes images directly in your browser, improving website speed without relying on external servers. This documentation covers everything from installation to advanced settings for both free and premium users.
Key Benefits:
- Compress images directly in your browser.
- No limits on the number of images compressed.
- WEBP conversion for modern browser support.
- No third-party servers involved, ensuring privacy.
If you need assistance, visit our Support Page.
2. Getting Started
2.1 Installation & Activation (Free version)
Installing from WordPress Repository
- Go to WordPress Dashboard > Plugins > Add New Plugin.
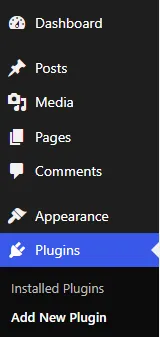
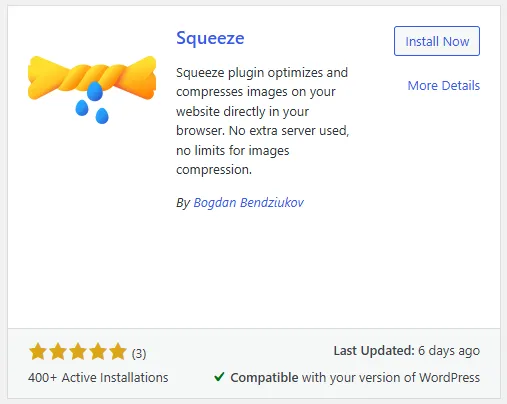
- Search for Squeeze.

- Click Install Now and then Activate.
Uploading the Plugin Manually
- Download the latest version from the WordPress plugin repository.

- Go to WordPress Dashboard > Plugins > Add New Plugin > Upload Plugin.
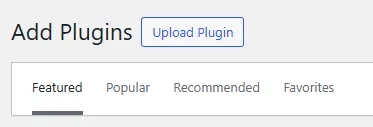
- Upload the ZIP file and click Install Now.
- Activate the plugin after installation.
2.2 Installation & Activation (Premium version)
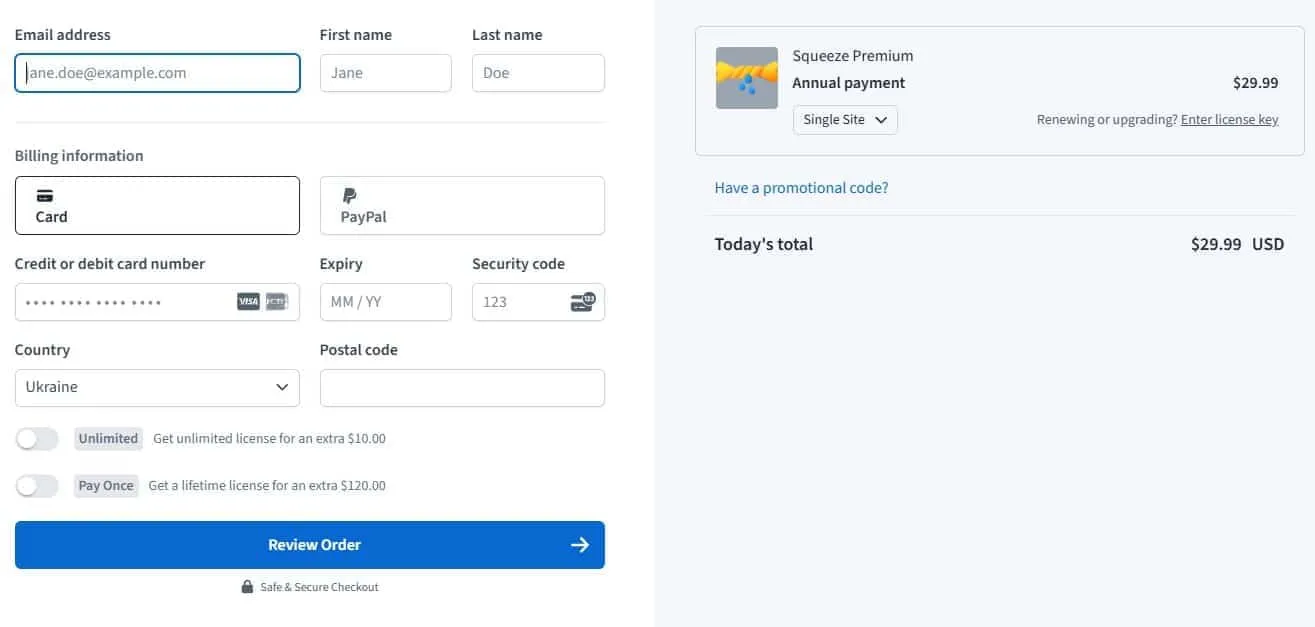
- Navigate to the checkout page of the Squeeze Premium plugin: https://checkout.freemius.com/plugin/17217/plan/28703/
The link above is also available in the Free version, when you navigate to Settings -> Squeeze -> Upgrade tab: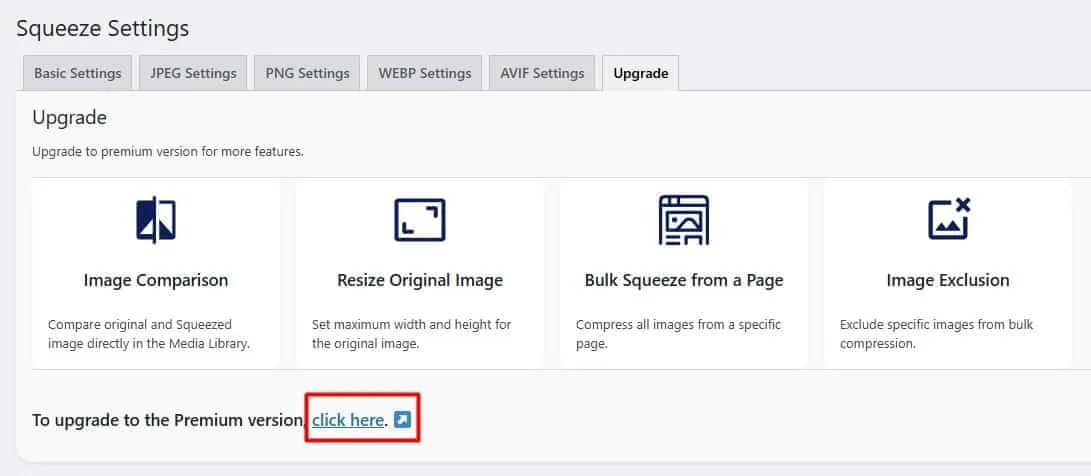
- Select desired billing plan (annual or lifetime) and complete the checkout process.
- After payment, you will receive a confirmation email with the download link and license key.
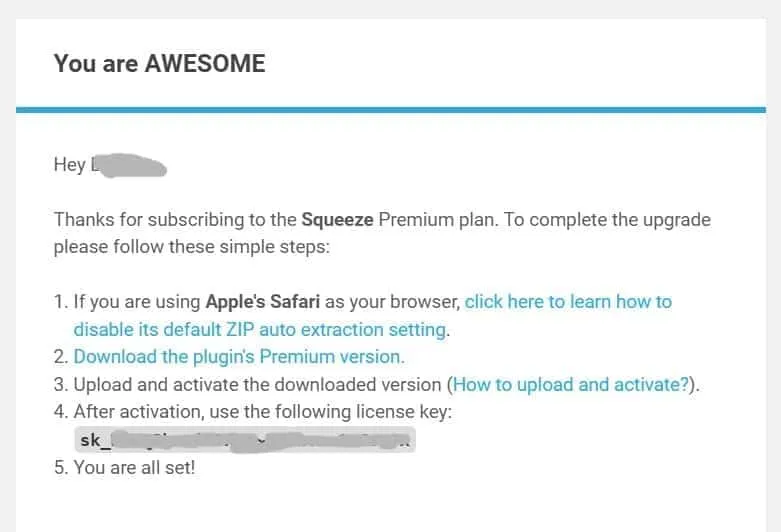
- Save the Premium’s version ZIP file (
squeeze-premium-latest.zip) to your computer. You can do that by clicking on the download link in the email (Download the plugin’s Premium version). - Install the Premium version by navigating to Plugins > Add New Plugin > Upload Plugin.
- Upload the ZIP file and click Install Now.
- Activate the Premium version of the plugin after installation.
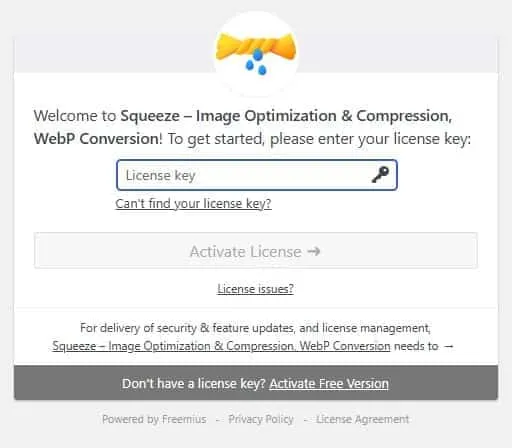
- After activation, copy and paste the license key from the email. You can do that on the Settings page of the plugin (Settings -> Squeeze):
2.3 Initial Setup
- Navigate to WordPress Dashboard > Settings > Squeeze.
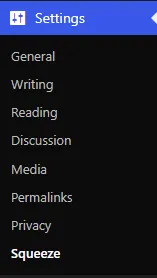
- Adjust the compression settings as you need.
- Alternatively, you can access the Squeeze Settings page from the plugins list:

3. Basic Settings
Here you can set up basic settings of the Squeeze Plugin.
3.1 Squeeze on Upload
- Enabling this option will automatically compress images when they are uploaded to the Media Library.
3.2 Backup Original Image
- If enabled, Squeeze will create a backup of the original image before applying compression.
- The backup can be restored if needed, thus you can re-compress your image with different compression options.
3.3 Image Formats
- Choose which image formats (JPEG/JPG, PNG, AVIF, WEBP) should be optimized.
3.4 Direct WEBP conversion
- Direct conversion of an image into WEBP format.
- The original image is being replaced by the compressed image in WEBP format:

- If you deactivate Squeeze while the Direct WebP option is enabled, some images may stop showing because their JPG/PNG versions were converted to WebP. To fix that, simply reselect those images in your posts or pages to restore the correct URLs.
3.5 Generate WEBP
- Automatically generate and serve WEBP images for all uploaded images.
- The original image URL remains the same, but the image will be served in WEBP format if supported by the browser.
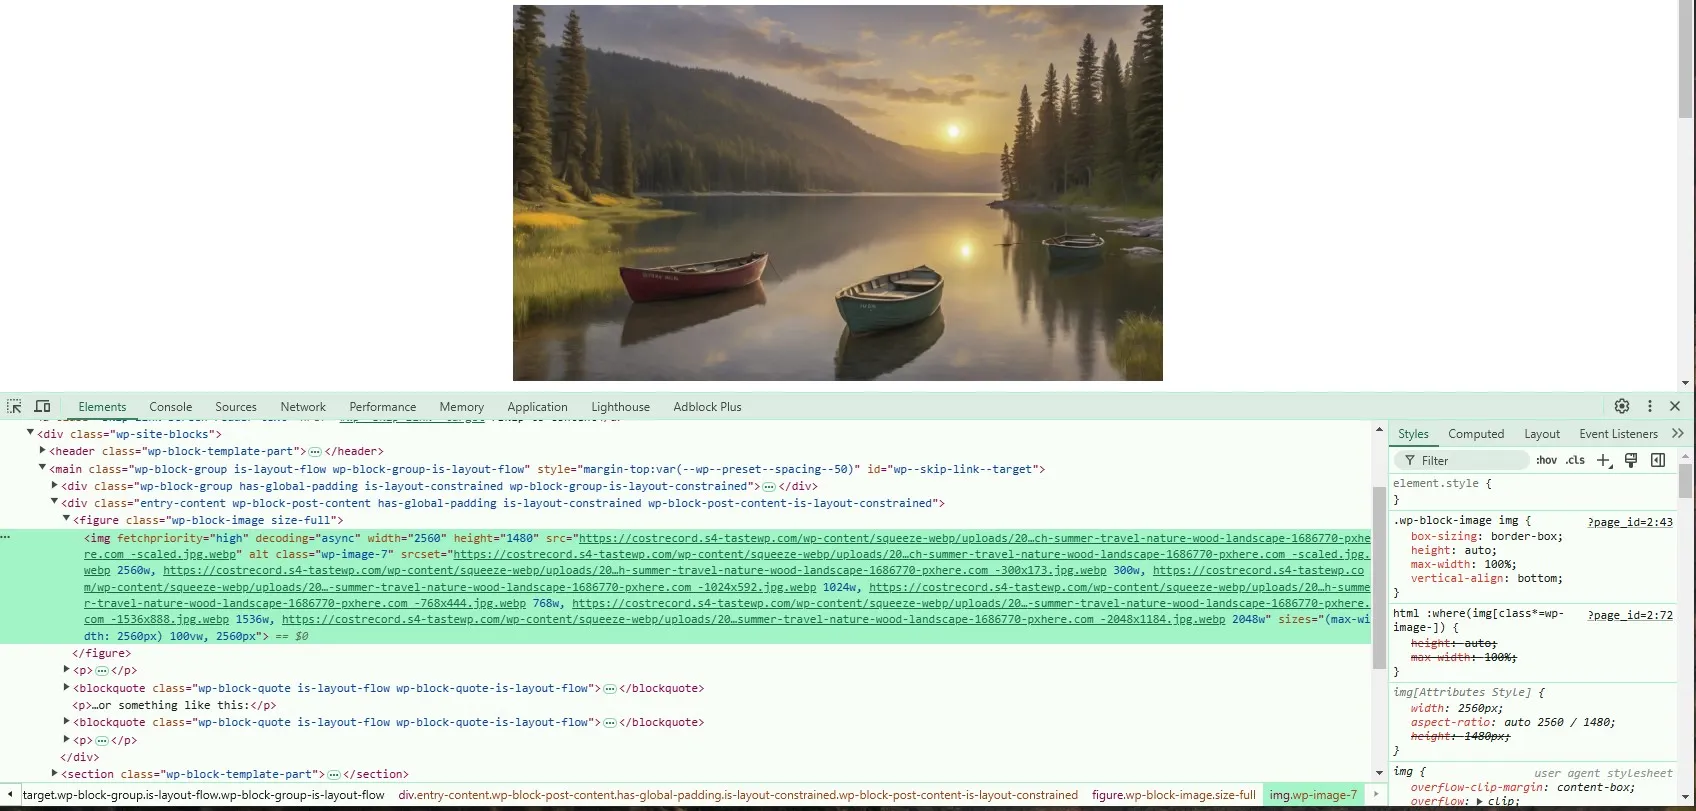
- As you can see on the screenshot below, the image’s extension is JPG, but the content type is in the WEBP format:

3.6 Replace Image URLs
- If WEBP serving does not work automatically, enabling this option replaces original image URLs with WEBP versions:
- The WEBP versions of the original images are located in a separate directory /wp-content/squeeze-webp/
3.7 Squeeze Thumbnails
- Select which thumbnail sizes should be compressed along with the original image.
3.8 Squeeze Timeout
- Set a time limit (in seconds) for squeezing an image (along with all the thumbnail sizes you selected above).
- If you experience errors, try increasing this value.
4. Premium Features
4.1 CDN URL
- If your site is using CDN, please enter the URL of your CDN here. It is required to fetch images correctly from a page via Bulk Squeeze From a Page feature.
4.2 Max Image Width
- Set a maximum width for the original size of images.The thumbnails width (as well as scaled images) will not be affected.
- Leave empty to keep the original width.
4.3 Max Image Height
- Set a maximum height for the original size of images.The thumbnails height (as well as scaled images) will not be affected.
- Leave empty to keep the original height.
5. JPEG Settings
Here you can set up compression options for the JPEG images.
Quality
- Adjust the compression quality for JPEG images. A lower value reduces file size but may decrease visual quality.
Smoothing
- Apply a smoothing effect to JPEG images to reduce noise and artifacts.
5.1 JPEG Advanced Settings
Here are listed more precise settings for experienced users. The options below are setted up to keep the most optimal result for your image compressions. Please keep them with their default values, if you are not sure what you’re doing 🙂
- Pointless Spec Compliance: Toggle compliance with unnecessary JPEG format specifications.
- Arithmetic: Enable arithmetic coding for better compression (may reduce compatibility).
- Progressive Rendering: Optimize images for progressive loading.
- Optimize Huffman Table: Reduce image file size by optimizing the Huffman coding.
- Channels: Control which color channels to keep in JPEG images.
- Quantization: Adjust color quantization settings for optimized storage.
- Trellis Multipass: Perform multiple passes of trellis optimization to reduce file size.
- Optimize Zero Block Runs: Optimize sequences of zero values to enhance compression.
- Optimize After Trellis Quantization: Further refine JPEG compression efficiency.
- Trellis Quantization Passes: Define the number of passes for trellis quantization.
- Auto Subsample Chroma: Automatically adjust chroma subsampling to balance quality and size.
- Subsample Chroma By: Manually set the chroma subsampling ratio.
- Separate Chroma Quality: Specify a different quality level for chroma components.
- Chroma Quality: Control the chroma quality to maintain color accuracy while reducing file size.
6. PNG Settings
Here you can set up compression options for the PNG images.
Effort
- Defines the amount of effort put into PNG compression.
- Higher values provide better compression but take longer.
Interlace
- Enable interlacing to progressively load images.
7. WEBP Settings
Here you can set up compression options for the WEBP images.
Effort
- Defines how much processing power should be used to optimize WEBP images.
Quality
- Adjust the compression quality for WEBP images.
Lossless
- Enable lossless WEBP compression to retain image quality while reducing size.
Near Lossless
- Set near-lossless compression for a balance between quality and file size.
8. AVIF Settings
Here you can set up compression options for the AVIF images.
Quality
- Adjust the quality setting for AVIF images to optimize performance and file size.
9. Compressing Images
Squeeze allows you to compress images directly from your WordPress Media Library or during the upload process.
Manual Compression
- Go to Media > Library (in your WordPress admin dashboard).
- Click on an image and find the Squeeze section (in the Grid mode).
- Click on the Squeeze button.
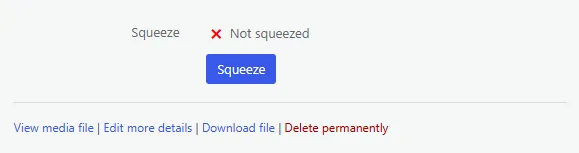
- In the List mode, you can click on the Squeeze button under the Squeeze column:

Bulk Compression
- Navigate to Media > Bulk Squeeze.
- You will see the graph which shows how many uncompressed images are left in your Media Library (among selected formats to compress).
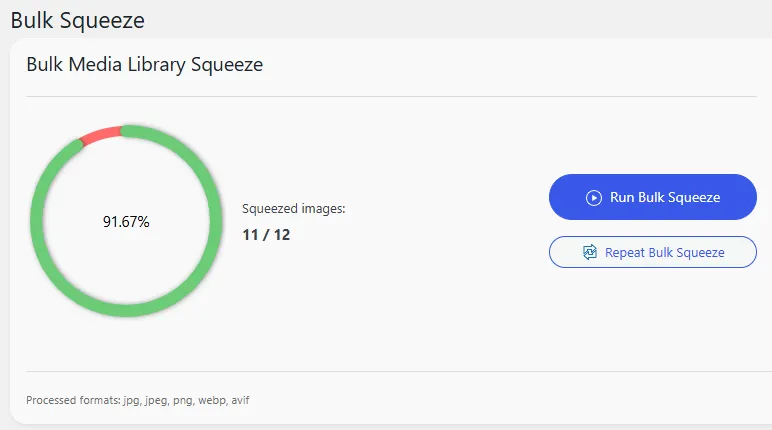
- Click Run Bulk Squeeze to compress images that are left.
- Click Repeat Bulk Squeeze to re-compress all the images from your Media Library again.
Bulk Compression via Media Library
- Navigate to Media > Library.
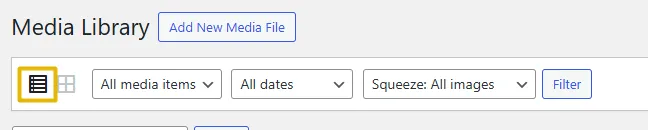
- Switch to the List mode:
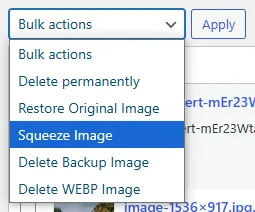
- Select images you want to squeeze. You can also select images that are already being squeezed, if you want to apply new squeezing options to them.
- In the Bulk actions dropdown select Squeeze Image and click on the Apply button.
9.1 Directory Squeeze
- Navigate to Media > Bulk Squeeze.
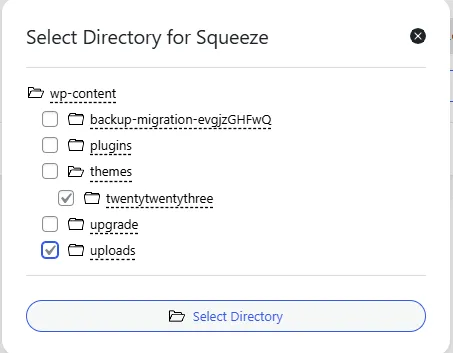
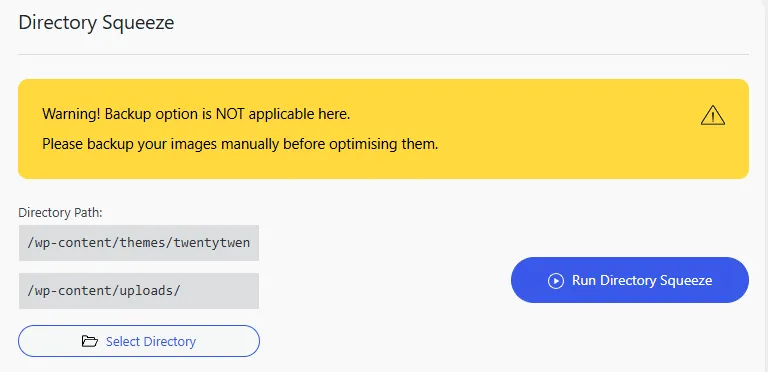
- Click Select Directory and choose a directory (or multiple directories) to compress all images within. Please note, that backup option is NOT applicable for this operation.
- Click on the Run Directory Squeeze button to start compressing images from the selected directories.
9.2. Bulk Squeeze from a Page (Premium Only)
This feature allows users to compress all images from a specific page on the website, such as single posts/pages, taxonomy pages (categories, tags, custom taxonomies), archive pages (author archives, date archives, etc.).
Exceptions: Drafts, trashed and private pages are excluded from bulk squeezing.
Note, if your site is using a CDN, you must provide the CDN URL in the Basic Settings for proper image retrieval.
- Login as Administrator to your site. Make sure the admin’s toolbar is enabled. You can enable it in your User Profile’s options (/wp-admin/profile.php):

- Navigate to the page on your site, where you want to bulk squeeze images from.
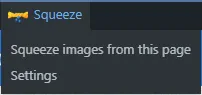
- At the admin’s toolbar hover the Squeeze menu and click Squeeze images from this page.
- You will be redirected to the page where you can see the process of fetching and compressing your images from the page.
10. Backup and Restore Images
To enable the backup option, navigate to Settings > Squeeze, under the Basic Settings tab check the Backup original image option. Click On the Save button at the bottom of the page.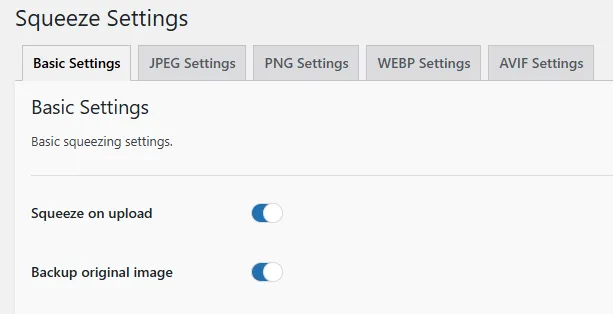
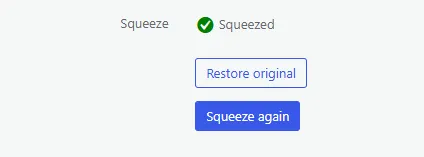
After backup is enabled, it allows you to restore an image to its original state before compression.
The Restore original button is available for the images, which have a backuped original image. You will see it in the same place where the Squeeze button was.
- In the Grid mode of the Media Library click on the image and find the Squeeze section, then click on the Restore original button:
- In the List mode of the Media Library you will see the Restore original button under the Squeeze column for each image which have a backup:

11. Additional Options
There are some additional features you may need.
Delete Backup Image
- Remove the backup file to free up storage space.
- This action is irreversible, so ensure you no longer need the original version before deleting.
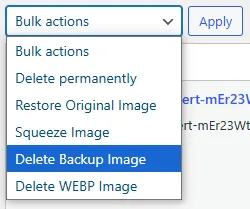
To delete backup of the image:
- Navigate to Media > Library.
- Switch to the List mode:
- Select images of which you want to delete backups.
- In the Bulk actions dropdown select Delete Backup Image and click on the Apply button.
Delete WEBP Images
- Allows you to remove all WEBP versions of images that were generated by the plugin.
- This is useful if you decide to stop using WEBP images or free up server space.
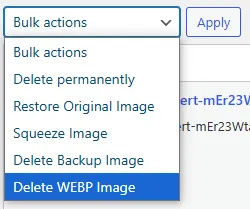
To delete WEBP images do the following:
- Navigate to Media > Library.
- Switch to the List mode:
- Select images of which you want to delete WEBP versions.
- In the Bulk actions dropdown select Delete WEBP Image and click on the Apply button.
Filter Images by Non-Squeezed in Media Library
- Easily identify images that have not been compressed yet.
- Navigate to Media > Library, and use the Non-Squeezed filter to list all uncompressed images.
- Available both in the List and Grid modes:
12. Troubleshooting & FAQs
12.1 Common Issues & Fixes
- Images not compressing?
Check permissions and enable Squeeze in the settings. - How are WEBP images served?
Squeeze plugin converts your JPG/PNG images into WEBP format replacing the original images.
To enable this feature, check the “Direct WEBP Conversion” option under the Basic Settings tab to convert images in WEBP format.
That means if you have an image in JPG format likeimage.jpg, after conversion to WEBP format it becomesimage.webp.
Previously, the generated WEBP images were stored in the wp-content/squeeze-webp directory within your WordPress installation.
That method is not very optimal, because it creates extra images which reduce your server’s storage space.
However, if you already used that approach, you can keep it enabled for backwards compatibility. - Is it safe to replace images with WEBP?
Yes! It’s perfectly safe, especially for new uploads.
For existing images, the Squeeze plugin can automatically update JPG/PNG image URLs to their WebP versions when available.
Just a quick note — this replacement happens only when the page loads, so your database isn’t changed. If you deactivate the Squeeze plugin, some images may stop showing. To fix that, simply reselect those images from the Media Library. - Will my images break if I deactivate the plugin?
If you deactivate Squeeze while the Direct WebP option is enabled, some images may stop showing because their JPG/PNG versions were converted to WebP.
To fix that, simply reselect those images in your posts or pages to restore the correct URLs. - Why am I seeing an alert “Image conversion blocked by browser privacy setting”?
That means your browser is blocking access to canvas image data (this prevents image conversion).
Theprivacy.resistFingerprintingsetting (or similar privacy features) is enabled.
What you can do:- Open
about:configin Firefox and setprivacy.resistFingerprintingtofalse, then restart Firefox. - Use a different browser (Chrome, Edge) or a browser profile without this setting.
- Open
- WEBP not being served?
Ensure you enabled the Generate WEBP option in the plugin’s settings.
If you see the notice “The Apache mod_rewrite module is not enabled on your server OR your server is not running Apache.” you can enable the option Replace images URLs to force serving WEBP images. - How to fix a “Request timed out” error?
Navigate to the plugin’s setting page (Settings > Squeeze).
At the “Basic Settings” tab increase the value of the field “Squeeze timeout”. By default it equals 60 seconds, try to make it bigger. If the error still persists, that means the script cannot process your image.
12.2 Frequently Asked Questions
- How does the plugin work?
The plugin uses client-side compression algorithms and provides you with the ability to compress images in your WordPress media library or during the image upload process. - What does the speed of image compression depend on?
Because the compression process happens directly into your browser – it depends on your device’s performance. - How are the images processed? Are they sent to an external server?
The images compressed directly in your browser – means no external server used. Squeeze does all the work locally. So you should not worry about privacy. - Which scripts are used for compressing and converting images?
The Squeeze plugin utilizes the same scripts and libraries that power the Squoosh.app, an open-source project by the Google Chrome team. These include highly efficient image processing libraries such as:- MozJPEG: Used for compressing JPEG images.
- OxiPNG: Used for compressing PNG images.
- WebP: Used for converting and compressing images to the modern WEBP format.
- AVIF: An advanced codec for creating lightweight and high-quality AVIF images.
- Why should I use image compression on my website?
Image compression helps improve your website’s performance by reducing the file size of images without significantly impacting their quality. Smaller image files load faster, resulting in faster page load times and a better user experience. Additionally, compressed images consume less bandwidth, which can be beneficial for websites with limited hosting resources or mobile users with limited data plans. - Which image formats does the Squeeze plugin work with?
The Squeeze plugin supports JPG, PNG, WEBP and AVIF image formats. - Can I compress multiple images at once?
Yes, the plugin provides a bulk compression feature. This saves time and effort compared to compressing images individually. - Can I compress images NOT from the Media Library, but from a custom folder?
Yes, you can compress images from any folder within your WordPress installation. - Can I customize the compression settings?
Yes, the plugin allows you to customize various compression settings according to your preferences. The Settings page is located at Settings -> Squeeze.
13. Support & Contact
13.1 Getting Help from the Community
- Visit WordPress Support Forum.
13.2 Bug Reports & Feature Requests
- Have a feature request? Let me know via feedback form.
Table of Contents
- 1. Introduction
- Welcome to the Squeeze Plugin Documentation
- 2. Getting Started
- 2.1 Installation & Activation (Free version)
- 2.2 Installation & Activation (Premium version)
- 2.3 Initial Setup
- 3. Basic Settings
- 3.1 Squeeze on Upload
- 3.2 Backup Original Image
- 3.3 Image Formats
- 3.4 Direct WEBP conversion
- 3.5 Generate WEBP
- 3.6 Replace Image URLs
- 3.7 Squeeze Thumbnails
- 3.8 Squeeze Timeout
- 4. Premium Features
- 4.1 CDN URL
- 4.2 Max Image Width
- 4.3 Max Image Height
- 5. JPEG Settings
- 5.1 JPEG Advanced Settings
- 6. PNG Settings
- 7. WEBP Settings
- 8. AVIF Settings
- 9. Compressing Images
- 9.1 Directory Squeeze
- 9.2. Bulk Squeeze from a Page (Premium Only)
- 10. Backup and Restore Images
- 11. Additional Options
- 12. Troubleshooting & FAQs
- 12.1 Common Issues & Fixes
- 12.2 Frequently Asked Questions
- 13. Support & Contact
- 13.1 Getting Help from the Community
- 13.2 Bug Reports & Feature Requests
Ready to try?

Keep in touch
Have a thought, complain or request?
Submit a form below.